Wednesday, 19 March 2025

PadFlash Tool Software Installation Guide (Windows System)

This detailed walkthrough will teach you how to install and set up the PadFlash Programmer Software on Windows seamlessly.


I. System Requirements & Preparations

Recommended OS: Windows 7 64-bit (for optimal compatibility)


II. Software & Driver Downloads

1. Access the Official Website

Visit https://www.padflashr.uk/

padflash-tool-software-installation-guide-1

padflash-tool-software-installation-guide-2

2. Download Drivers

On the download page, provide:

Email address

Tool Serial Number (SN)

Click "Download" to obtain drivers.

padflash-tool-software-installation-guide-3

3. Download the PadFlash Updater Tool

On the download page, provide:

Email address

Phone number

Click "Download" to get the Updater tool

padflash-tool-software-installation-guide-4

III. Software Installation & Registration

1. Install PadFlash Updater

Run the downloaded installer and follow the default setup steps.

A desktop shortcut named PadflashUpdater Setup will be created.

padflash-tool-software-installation-guide-5

2. Register Your Account

Launch the Updater via the desktop shortcut.

Enter the following details to register:

Email address

Tool Serial Number (SN)

padflash-tool-software-installation-guide-6

3. Initialize Updates

Restart the PadFlash Updater.

Click Download Update Files and wait for completion.

padflash-tool-software-installation-guide-7

padflash-tool-software-installation-guide-8

Critical Step: After the download, restart the Updater 3 times.

padflash-tool-software-installation-guide-9

IV. Hardware Driver Installation

1. Install Dongle Driver

Insert the dongle into a USB port.

Allow the system to detect it, then install the driver automatically.

padflash-tool-software-installation-guide-10

2. Install Tool Drivers

Connect the PadFlash tool to your PC via USB.

Install the drivers in this order

padflash-tool-software-installation-guide-11

padflash-tool-software-installation-guide-12

padflash-tool-software-installation-guide-13

padflash-tool-software-installation-guide-14

V. Software Activation & Usage

1. Activate Tool License

Launch the PadFlash software and click Active.

Enter the tool serial number in UPPERCASE letters.


2. Firmware Update Workflow

Before closing the software:

Click Activate the FW to update the tool’s firmware.

Exiting the software triggers a full firmware upgrade. Repeat this step every time you close the software.

padflash-tool-software-installation-guide-15

VI. Important Notes

1. Ensure the serial number is entered in UPPERCASE (copy-paste recommended).

2. Do NOT disconnect the tool or dongle during updates.

3. If driver installation fails, run the installer as Administrator.

4. Temporarily disable antivirus/firewall to avoid false positives.


By following these steps, you have completed the setup of the PadFlash tool. For technical support, contact www.obd2shop.co.uk.

Thursday, 13 February 2025

Comparison of PADFLASH, Foxflash, and Other Tools

When choosing a tool for ECU tuning and cloning, it's important to understand each option's strengths and limitations. In this article, we'll compare PADFLASH, Foxflash, and Other Tools based on their different features to help you make an informed decision.

comparison-of-padflash-foxflash-and-other-tools

1. TCU Support


PADFLASH: Offers average support for TCU (Transmission Control Unit).

Foxflash: Provides strong support for TCU.

Other Tools: Only some tools offer TCU support.


2. BENCH Support


PADFLASH: Yes.

Foxflash: Yes.

Other Tools: Only some tools support BENCH operations.


3. Supported Vehicle Types


PADFLASH: Supports a wide range including cars, trucks, tractors, marine vehicles, and bikes.

Foxflash: Also supports cars, trucks, tractors, marine vehicles, and bikes.

Other Tools: Typically support cars, trucks, or bikes but may not cover all vehicle types.


4. Subscription Fees


PADFLASH: No subscription fees.

Foxflash: No subscription fees.

Other Tools: Some tools require a subscription fee, around $600 per year, while others do not.


5. Dongle Requirement


PADFLASH: Requires a dongle.

Foxflash: Does not require a dongle.

Other Tools: Some tools come with a dongle, while others do not.


6. Read Methods


PADFLASH: Supports multiple methods including BENCH, OBD, full connection, BOOT, JTAG, and BDM.

Foxflash: Also supports BENCH, OBD, full connection, BOOT, JTAG, and BDM.

Other Tools: Some tools partially support these methods.


7. Virtual Read


PADFLASH: Yes.

Foxflash: Yes.

Other Tools: Some tools support virtual read, while others do not.


8. Internet Connection


PADFLASH: Requires an internet connection.

Foxflash: Requires an internet connection.

Other Tools: Also require an internet connection.


9. Special Features


EMS2.4: Supported by PADFLASH but not by Foxflash. Some other tools support it.

SID6 SIDS: Supported by PADFLASH but not by Foxflash. Some other tools support it.

MD1CS018 MG1CA811: Supported by PADFLASH but not by Foxflash. Some other tools support it.


10. Cloning Capabilities


PSG16 CLONE: PADFLASH can clone via BENCH read, while Foxflash cannot clone via OBD read.

M10JA: PADFLASH can clone via BENCH read, while Foxflash cannot clone via OBD, BOOT, or OTB.

PSG16: PADFLASH uses BENCH, Foxflash uses OBD.


11. Order Options


PADFLASH: Can be ordered separately.

Foxflash: Only available as a full version.

Other Tools: Some tools offer separate ordering options, while others do not.


12. Languages Supported


PADFLASH: Supports 16 languages.

Foxflash: Supports fewer than 16 languages.

Other Tools: Typically support about 6 languages.


13. Speed Modification


PADFLASH: Partially supports speed modification.

Foxflash: Does not support speed modification.

Other Tools: Some tools support speed modification, while others do not.


14. Counter Reset


PADFLASH: Supports counter reset.

Foxflash: Does not support counter reset.

Other Tools: Some tools support counter reset, while others do not.


Conclusion


If you need a tool that allows cloning without opening the ECU, PADFLASH is a better choice due to its comprehensive support and flexibility. Foxflash excels in TCU support and offers a robust full version without the need for a dongle. Other tools vary widely in their capabilities and may require additional fees or have limited support.


Choosing the right tool depends on your specific needs, such as the types of vehicles you work with and the features you require.


www.obd2shop.co.uk

Wednesday, 11 December 2024

Dimsport New Genius License 2024 December Sale

Good news! Dimsport's New Genius License Sale at www.obd2shop.co.uk is in full swing and will last until December 30th, 2024. For details, please check the promotion chart below.

dimsport-new-genius-license-2024-december-sale

dimsport-new-genius-license-2024-december-sale-1

dimsport-new-genius-license-2024-december-sale-2

dimsport-new-genius-license-2024-december-sale-3

dimsport-new-genius-license-2024-december-sale-4

dimsport-new-genius-license-2024-december-sale-5

Please consult online service for above discount.

www.obd2shop.co.uk

Monday, 18 November 2024

Alientech KESS V3 2024 Black Friday Sale: Save 50% Off!

We're excited to inform you that the Alientech KESS V3 2024 Back Friday Sale has been released: save up to 50% off! The sale is valid from November 18th to December 3rd, 2024. This is the last sale of the year, so don't miss it!

alientech-kess-v3-2024-black-friday-sale-save-50-off-1

Event Details

alientech-kess-v3-2024-black-friday-sale-save-50-off-2

Contact Info

Email: Sales@OBD2shop.co.uk

WhatsApp: +86 13983755934

Telephone: +86 13983755934

WeChat: +86 13983755934

Skype: OBD2tool.co.uk

www.obd2shop.co.uk

Friday, 5 July 2024

The new DynoDrive feature for KESS3 is now available

Today I have great news for you! The wait is over and the new DynoDrive feature for KESS3 is now available for sale!

new-dynodrive-feature-for-kess3

As anticipated in May 2024, DynoDrive is the new paid feature available for KESS3 that can measure car performance before and after ECU modification.

All users with KESS3 can activate the DynoDrive feature and it does NOT require an active subscription.

The main innovation is that DynoDrive can also be activated on KESS3 Hardware WITHOUT any active protocol package. Customers can purchase KESS3 with DynoDrive activation to perform performance testing and use other ECU programming equipment to program the control unit.


You can click the following links to purchase:

Alientech KESS3MKWO KESS3 Master - DynoDrive Activator

KESS3MKWO KESS3 Slave-DynoDrive Activation

KESS3MKWO KESS3 Hardware - DynoDrive Activation


For more information, please contact

Email: sales@obd2shop.co.uk

TEL&WhatsApp: +86 13983755934

www.obd2shop.co.uk

Thursday, 27 June 2024

Alientech KESS3 DTC Feature Free Upgrade

Good news! A new feature upgrade: The DTC Feature is now available with an active KESS3 subscription.


The new "DTC" feature of KESS3 allows you to view and reset DTCs in a car or motorcycle.

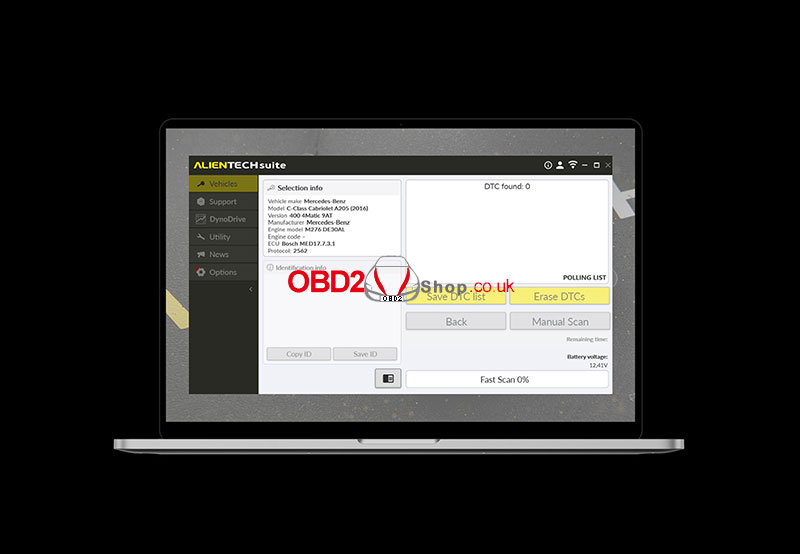
Through the EOBD connection of KESS3, Alientech Suite retrieves the list of (SAE – Society Automotive Engineers) error codes recorded during vehicle operation, helping mechanics and mechatronics easily identify potential faults and damages.


WHAT ARE THE KEY POINTS OF THE NEW DTC FEATURE?

1. DETECTION AND INTERPRETATION OF ERROR CODES

2. RESETTING ERROR CODES

3. PRE-TUNING AND POST-TUNING DIAGNOSTICS

4. SPECIAL FUNCTIONS


1. Detection and Interpretation of DTCs

When connected to the control unit, KESS3 obtains the stored error codes.

Via the KESS3's OBD connection, Alientech Suite reports the list of error codes (SAE - Society of Automotive Engineers) recorded during vehicle operation, helping mechanics and mechatronics engineers to identify any faults easily.

alientech-kess3-dtc-feature-free-upgrade-1

2. Resetting DTCs

After identifying the codes, it is possible to reset them, thereby eliminating warning lights and anomalies on the dashboard.

Clearing the fault is essential for ensuring the proper functioning of the vehicle. After mechanical repairs, this KESS3 feature allows for a DTC reset, providing comprehensive service.

alientech-kess3-dtc-feature-free-upgrade-2

3. Pre-Tuning and Post-Tuning Diagnostics

Assessment of risks and feasibility of modifications.

This feature allows you to preview and interpret error codes to prevent faults or malfunctions in the vehicle. Additionally, the same process can be performed after modifying the engine parameters with KESS3. In this case, the DTC feature helps identify any error codes that could appear after the tuning phase.


alientech-kess3-dtc-feature-free-upgrade-3

4. Special Functions

Special functions are dedicated to specific vehicle models.

Some special functions such as steering alignment, differential lock/unlock, or resizing of wheel dimensions are available for some vehicle models. These specific functions are included in the "DTC" feature package and expand the range of modification and customization interventions.

alientech-kess3-dtc-feature-free-upgrade-4

For more information about KESS 3 please visit www.obd2shop.co.uk


Monday, 5 February 2024

PCMtuner + GODIAG Read Ford SID208 ECU with Openport

This is a tutorial on how to use PCMtuner + GODIAG GT100 & ECU GPT Adapter to read Ford SID208 with Openport. Read this article to learn the procedure.


Connection

1) Connect PCMtuner, GODIAG GT100, GODIAG ECU GPT Boot AD Adapter & SID208 module together.

2) Plug the PCMtuner dongle into the computer, and connect it to power.


Note: When simulating reading the car password, you must press the switch, otherwise it cannot be read.

pcmtuner-godiag-read-ford-sid208-ecu-with-openport-1

pcmtuner-godiag-read-ford-sid208-ecu-with-openport-2

Operation

Open PCMFlash software on the computer.

JIR SID208 >> Identification >> Read

Save the read password file.

pcmtuner-godiag-read-ford-sid208-ecu-with-openport-3

pcmtuner-godiag-read-ford-sid208-ecu-with-openport-4

Use a screwdriver to disassemble the ECU.

Connect the ECU with colored jumpers according to the previous wiring diagram.

And then solder the chip to the PCB board.

You can directly use the red wire to connect CNF1 on the PCB board, which is very convenient.

pcmtuner-godiag-read-ford-sid208-ecu-with-openport-5

pcmtuner-godiag-read-ford-sid208-ecu-with-openport-6

pcmtuner-godiag-read-ford-sid208-ecu-with-openport-7

After soldering is completed, open the PCMFlash software.

TC1797 MICRO >> Identification

At this time, manually pop up the switch button.

*The open port device needs to be read automatically, so you must manually pop up the switch.

Click "Read" after recognizing it >> Select the password file you just read

Save the data file after reading.

Continue to read the Flash data.

TC1797 eeprom >> Identification >> Read >> Select the password file >> OK

Save data file.

Completed.

pcmtuner-godiag-read-ford-sid208-ecu-with-openport-8

pcmtuner-godiag-read-ford-sid208-ecu-with-openport-9

pcmtuner-godiag-read-ford-sid208-ecu-with-openport-10

pcmtuner-godiag-read-ford-sid208-ecu-with-openport-11

www.obd2shop.co.uk

Formula Flash New Ford Bench Support: SID211, SID212 & SID212EVO

Formula Flash expands its Ford Bench support with new coverage for the SID211 and SID212/SID212EVO ECU families. The update adds Bench Mode...